Sharing Large Files with External Contacts via OneDrive
When a file is too large to attach to an email, OneDrive lets you upload it once and send a secure link instead. This guide walks through setting up an organised folder structure and generating a shareable link for someone outside the company.
What you need
- Your M365 account (
yourname@questcominc.com) - The file(s) you want to share
- The recipient's email address
Step 1 — Open OneDrive on the web
- Open Chrome and go to https://onedrive.microsoft.cloud.
- Sign in with your
your.name@questcominc.comaccount if prompted.
Step 2 — Create a "Shared" folder
Keeping shared files in a dedicated folder makes it easy to manage links and tidy up later.
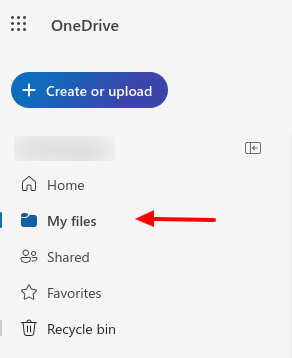
- In the left sidebar, click My files.
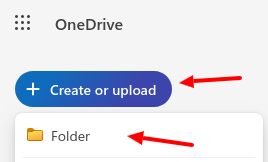
- Click + Create or upload and select Folder.
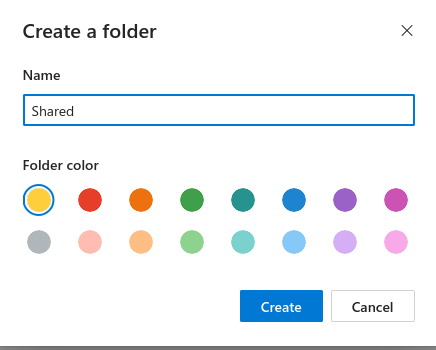
- Name the folder
Sharedand click Create.
Step 3 — Create a client subfolder
- Double-click the Shared folder you just created to open it.

- Click + Create or upload → Folder.
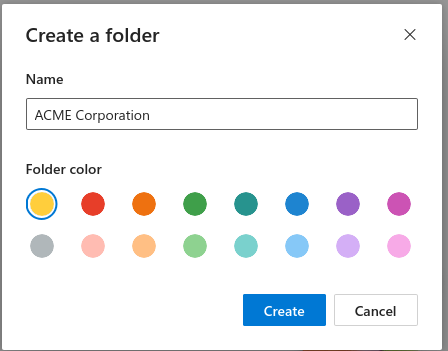
- Name the folder after the client or recipient (e.g.
Acme Corp) and click Create.
- Double-click that subfolder to open it.
One subfolder per client
Creating a subfolder for each client means you can revoke or update a link for one client without affecting others.
Step 4 — Upload the file(s)
- Inside the client subfolder, click + New → Files upload
— or drag and drop files directly from your desktop into the browser window. - Wait for the upload to finish. A progress bar appears in the bottom-right corner.
Large files
OneDrive supports files up to 250 GB. If the upload stalls, try a wired connection or break a very large archive into smaller parts.
Step 5 — Create a sharing link
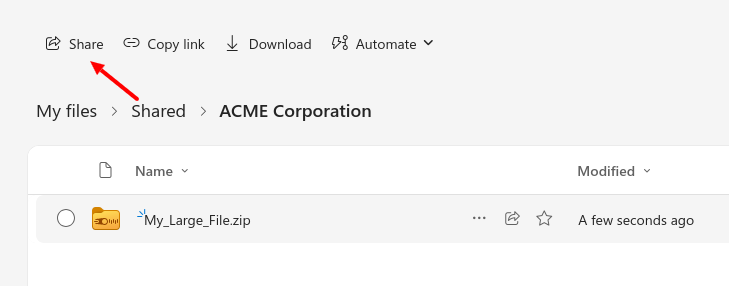
- Hover over the file you want to share and click the circle checkbox to select it.
- In the toolbar at the top, click Share.
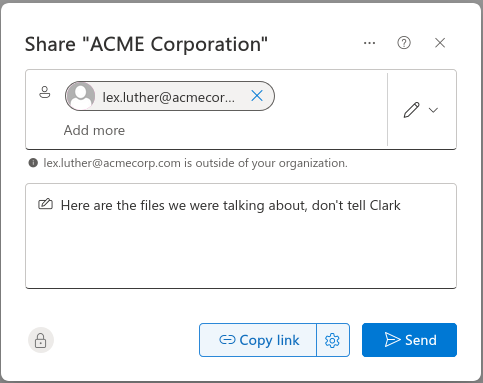
- In the sharing panel, click Copy link at the bottom — or click the pencil icon next to People you specify can edit to change the permission level first.
Recommended settings for external sharing
| Setting | Recommended value |
|---|---|
| Who can access | Anyone with the link |
| Permission | Can view (unless the recipient needs to edit) |
| Expiry date | Set one (e.g. 30 days) so the link does not live forever |
| Password | Optional — add one for sensitive files |
- Click Apply after adjusting settings, then click Copy link.
Step 6 — Send the link to the recipient
- Paste the copied link into an email or Teams message to the recipient.
- If you set a password, share it via a separate channel (e.g. a phone call or text message).
The link works in any browser
The recipient does not need a Microsoft account or OneDrive installed — they can download the file directly in their browser.
Managing links later
To update or revoke a link after sending it:
- Navigate back to the file in OneDrive.
- Hover over the file and click the ... (More options) menu → Manage access.
- Under Links, click the ... (More options) next to the link and choose Remove link or Change settings.
Need help?
Contact Tech Support at tech.support@questcominc.com